
Custom Apparel for Small Teams: 2026 Buying Guide
Table of Contents
- Custom Apparel for Small Teams: What to Decide Before You Order
- A Step-by-Step Ordering Workflow for a Small Team
- Custom Team Shirts: Matching Garments to the Group
- Custom Work Shirts With Logo: Branding for Crews and Staff
- Custom Shirts With No Minimum Order: How Small Runs Really Work
- Screen Printing vs. Embroidery for Shirts: Which Fits Your Design
- Artwork, Proofs, and Reorders: Getting the Details Right
- Conclusion: Plan the Order, Then Place It
- Frequently Asked Questions
Last Updated: October 14, 2026
Custom Apparel for Small Teams: What to Decide Before You Order
Custom apparel for small teams comes down to four decisions that drive both your final cost and how the finished garments actually look.
The U.S. Small Business Administration's guidance on buying for small operations makes a point that applies here: small orders carry proportionally higher per-unit costs, so planning matters more, not less.
Here's what we'll cover: garment choice, decoration method, sizing, and artwork prep. Get those right and the order practically places itself.
Four decisions that control your total cost
Garment selection sets your base price.
Decoration method determines both look and longevity. Screen printing and embroidery have different minimums, setup costs, and durability profiles.
Quantity drives per-item pricing. Ordering 15 shirts costs more per shirt than ordering 50, which is why small teams should think about reorders upfront.
Artwork readiness affects setup fees. A clean vector file prints without extra charges; a low-resolution phone photo often needs redrawing first.
A Step-by-Step Ordering Workflow for a Small Team
The most reliable way to order team apparel is a fixed five-step sequence: define the garment, collect sizes, prepare artwork, approve a proof, then place the order.
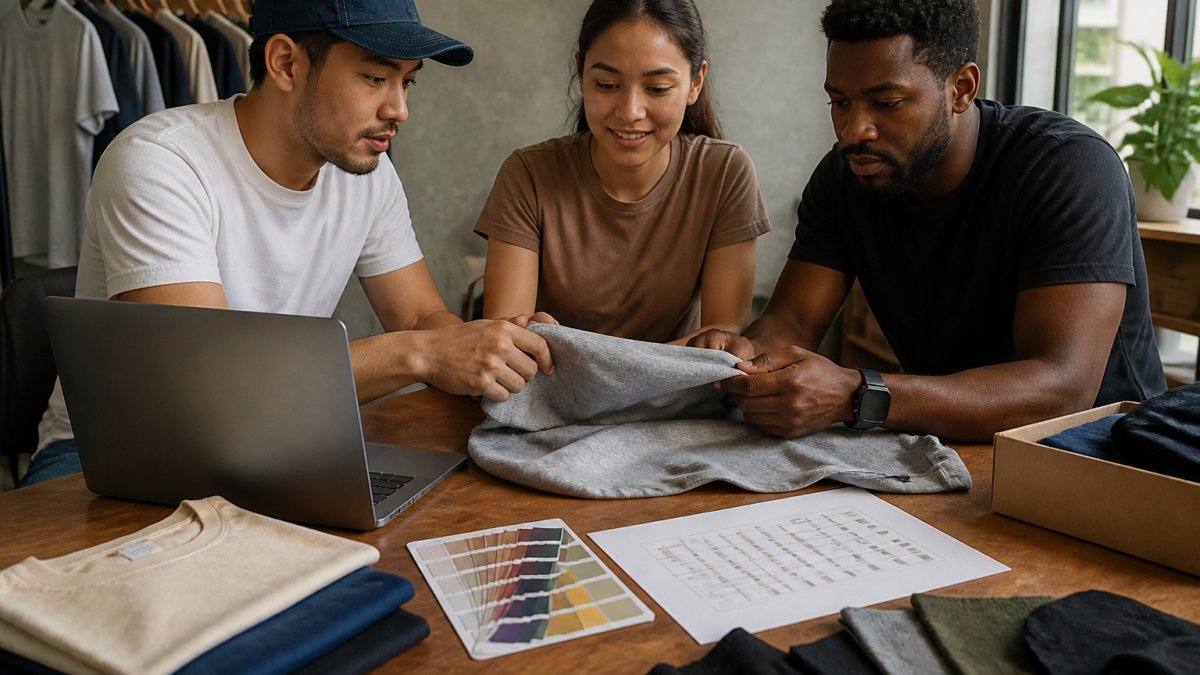
- Pick the garment and color. One shirt color keeps costs down and looks coordinated.
- Collect sizes from everyone. Use a shared form, not group texts.
- Prepare your artwork. Logo, team name, or design in the highest resolution you have.
- Approve the proof. Review placement, size, and color before anything prints.
- Place the order and confirm turnaround. Build in buffer time before your event.
Collecting sizes without chasing everyone
Size collection is the step teams underestimate. The fix is a simple shared spreadsheet with columns for name, shirt size, and preferred fit. Send it once with a hard deadline, then follow up only with non-responders.
Order a couple of extra units in the most common sizes. They cover late additions and replacements without a second order.
Custom Team Shirts: Matching Garments to the Group
Custom team shirts work best when the garment matches how the group will actually wear them. A sports team needs moisture-friendly performance fabric; an office crew needs something presentable enough for clients.
For everyday team shirts, a soft cotton tee is the workhorse. Our Custom Short Sleeve T-Shirt is a unisex Gildan option at $15.00 per shirt, built from breathable cotton that holds up through repeated washing.

Hoodies, sweatshirts, jackets, hats, and bags
Layering pieces extend your branding beyond the shirt. Hoodies and sweatshirts suit cooler months and casual crews. Lightweight jackets work for outdoor and event staff. Hats and bags round out the kit and give you options for people who won't wear a tee.
Bags matter more than most teams expect. A branded tote or duffel travels to trade shows, gyms, and job sites, which means your logo does too.
Custom Work Shirts With Logo: Branding for Crews and Staff
Custom work shirts with a logo turn a scattered crew into a recognizable team. The logo placement decision matters more than the logo itself: left chest reads as professional, full back reads as promotional, and a small sleeve mark works as a subtle accent.
For staff-facing apparel, keep the design restrained. A single-color logo on a neutral shirt looks intentional. A busy full-color design on a bright shirt often looks like merchandise rather than a uniform.
- Left chest: standard for workwear and uniforms
- Full back: best for events, teams, and giveaways
- Sleeve: subtle branding that pairs with a chest logo
Custom Shirts With No Minimum Order: How Small Runs Really Work
Custom shirts with no minimum order mean you can buy exactly what you need, whether that's 8 shirts for a startup or 3 hoodies for a hobby group.
Here's the honest trade-off: per-item cost is higher on very small runs because setup and labor spread across fewer units.
| Order Size | Per-Item Cost | Best For |
|---|---|---|
| 1-9 items | Highest | Samples, gifts, hobby groups |
| 10-24 items | Mid-range | Small crews, bulk discount tier |
| 25+ items | Lowest | Full teams, events, staff uniforms |
Our bulk discounts kick in at 10 or more items, which is usually the point where a small team crosses from "testing it out" into a real branded kit.
Screen Printing vs. Embroidery for Shirts: Which Fits Your Design
Screen printing and embroidery for shirts are not interchangeable, and the right pick depends on four variables: your design's complexity, the fabric, the quantity, and how the garment will be worn. Most buying guides stop at "printing for graphics, embroidery for logos." That advice is incomplete, and it's where small teams waste money.
Here's the mechanism behind each method, so you can decide with real information.
How screen printing actually works
Screen printing pushes ink through a mesh screen onto the fabric, one screen per color. A one-color logo needs one screen; a four-color logo needs four. Each screen carries a setup cost and a setup step, which is why per-color pricing exists and why a design with fewer colors is cheaper to run.
- Best for: bold graphics, large front or back prints, cotton and cotton-blend tees
- Weak spots: photographic gradients, fine detail below roughly 1/16 inch, and stretchy performance fabrics that can distort the print
- Quantity reality: setup costs spread across units, so screen printing gets cheaper per item as the run grows. On very small runs, that setup is a larger share of each shirt's price.
How embroidery actually works
Embroidery stitches thread directly into the garment using a digitized file. That digitizing step is a one-time cost per design, and it's what turns your logo into a stitch path the machine can follow. Once digitized, the file is reusable on every future order.
- Best for: logos, left-chest marks, polos, jackets, hats, and structured garments
- Weak spots: very small text, thin lines, and dense multi-color gradients, which can turn into a stitched blob
- Durability: thread outlasts most prints through repeated industrial washing, which is why workwear and uniforms lean embroidered
A quick decision framework
| Your situation | Recommended method |
|---|---|
| Large graphic, 2-3 colors, cotton tees, 12+ units | Screen printing |
| Left-chest logo, polos or jackets, any quantity | Embroidery |
| Full-color photo or gradient design | |
| Uniform that gets washed hard | Embroidery |
The fabric question most guides skip
Fabric decides as much as design does. Cotton and cotton blends take screen printing cleanly. Structured woven garments like jackets and caps hold embroidery without puckering. Stretchy performance knits are the tricky middle: some print methods crack when the fabric flexes, while embroidery on a thin stretchy knit can pull. If your team wears performance fabric, ask specifically which method the shop recommends for that garment rather than assuming your usual choice carries over.
The combination play
For uniforms, the strongest look is often a chest logo in embroidery plus a large back print in screen printing. You get the durable, professional chest mark and the bold back graphic, and you only pay digitizing once. This is a common setup for staff uniforms and event crews.
Artwork, Proofs, and Reorders: Getting the Details Right
Artwork preparation is the step most small teams rush, and it's the one that most often adds cost or delays. Here is the practical version: what file to send, what resolution means, how color gets matched, and how to keep reorders consistent.
File formats: what to send and what to avoid
- Vector files (.ai, .eps, .pdf, .svg): the gold standard. Vector art scales to any size without losing sharpness, so it works for a left-chest logo and a full back print from the same file.
- High-resolution raster (.png, .tif, .jpg): usable if large enough. Aim for at least 300 DPI at the final print size. A 300 DPI file at 3 inches wide is not the same as a 300 DPI file at 12 inches wide, the physical print size matters.
- Low-resolution images and phone photos: usually need a redraw or vectorization step, which is a separate charge. If your only logo is a screenshot or a photo of a business card, expect that fee.
Color matching: Pantone, CMYK, and why your screen lies
The color on your monitor is not the color that prints. Monitors use RGB light; ink and thread use pigment. That gap is why shops match to a standard.
- Pantone (PMS) numbers are the most reliable way to specify a color for both ink and thread. If your brand has a Pantone value, send it.
- CMYK values work for print but can shift on fabric.
- Thread colors for embroidery are matched to a thread chart, which is close to but not identical to Pantone.
If exact brand color matters, ask for a physical sample or a stitch-out before the full run. A digital proof cannot show you how ink behaves on a specific fabric.
Reading a proof like a pro
A proof is a preview of exactly what will be produced. Review it against this checklist before you approve anything:
- Spelling, every name, number, and word, letter by letter.
- Placement, is the logo centered on the chest, and at the height you expected?
- Size, measure the proof's logo dimensions against the garment, not against your screen.
- Color, confirm the Pantone or thread match, and flag anything that looks off.
- Garment and style, confirm the exact style number and color, because similar-looking shirts from different lines print differently.
Once you approve the proof, that file is what gets produced. A misplaced or undersized logo cannot be fixed after printing, and the run is yours to keep.
Reorders: the record that saves you money
Small teams add members, lose shirts, and run events again. The teams that reorder smoothly keep a simple record on file:
- The vector artwork file and any digitized embroidery file
- The exact garment style number, color, and size breakdown
- The approved proof and the Pantone or thread color used
With that record, a reorder of 10 more shirts matches the original run in color and placement, and you avoid paying setup or digitizing costs a second time. Without it, a new order can come back a slightly different shade or size, and the mismatch is permanent.
Conclusion: Plan the Order, Then Place It
The teams that get the best results from custom apparel aren't the ones with the biggest budgets. They're the ones who decide on garments, decoration, and sizing before they order, then approve a proof instead of hoping.
K&M Print Works makes that straightforward with no minimums, bulk discounts on orders of 10 or more items, and nationwide shipping. Start with a Starter Bundle at $99.00 for 6 shirts and 2 hats, or scale up to the Team Essential at $252.00 for 15 shirts and 6 hats.


Frequently Asked Questions
Can I order custom team apparel with no minimum quantity?
Yes. K&M Print Works built its business around no minimums, so a 6-shirt run and a 60-shirt run both go through the same process. Small runs cost more per item because setup work is spread across fewer pieces, which is why the per-item price drops on bulk orders of 10 or more items. If you only need 15 shirts for a work crew, order 15. You are not forced into 50 to get a reasonable price.
How do I choose custom apparel for a small team?
Start with how the garment will be worn. Then match decoration to the fabric: embroidery holds up on polos, hats, and workwear, while screen printing suits large graphics on tees.
Which is better for team apparel: screen printing or embroidery?
It depends on the design and the garment. Screen printing produces bold, opaque color on cotton and cotton-blend tees. Embroidery gives a raised, durable finish. For a small team, a common split is screen-printed tees for events and embroidered logo shirts for daily workwear.
How many custom shirts should I order for a small team?
Order one per person plus a small buffer of 10 to 15 percent for replacements, new hires, and sizing swaps. A 12-person crew, for example, works well with 14 shirts. Because K&M Print Works has no minimums, you can reorder the exact extras you need later instead of stockpiling inventory. Bulk discounts start at 10 or more items, so grouping shirts and hats in one order often lowers the per-item price.